Veröffentlicht am

Hollunderbluetensirup

Hollunderblüten riechen so toll nach Frühling/Sommer und der Sirup schmeckt so lecker! Einfach gekühlt mit Mineralwasser oder in Sekt, oder oder…

Deshalb habe ich einen kleinen Streifzug durch den Sinaipark in Frankfurt gemacht und Hollunderdolden gesammelt. Lange musste ich nicht suchen, denn es blüht gerade überall!

Hier das Rezept das ich verwendet habe (von Chefkoch):

——————

10 Holunderblütendolden
1 kg Zucker
15 g Zitronensäure, bis 25 g
1 Liter Wasser

Aus diesem Grundrezept entstehen ca. 1,5 Liter fertiger Sirup. 

Die Holunderblütendolden im vollreifen Zustand ernten. Die Blüten sollten sehr stark duften und geöffnet sein.

Dann je 10-15 Blüten mit je einem Liter Wasser ansetzen und 24 Stunden ziehen lassen. 

Durch ein feines Sieb seihen und pro Liter Wasser 1 kg Zucker und 15-25 g Zitronensäure zusammen aufkochen lassen. Durch das Aufkochen löst sich der Zucker leichter und der Sirup wird länger haltbar. 

Noch heiß in gut gespülte Flaschen füllen. 

Tipp: Man kann auch statt der Zitronensäure pro Liter Ansatz den Saft von 1-2 frischen Zitronen nehmen, mit der Säure wird der Saft allerdings spritziger.

——————-

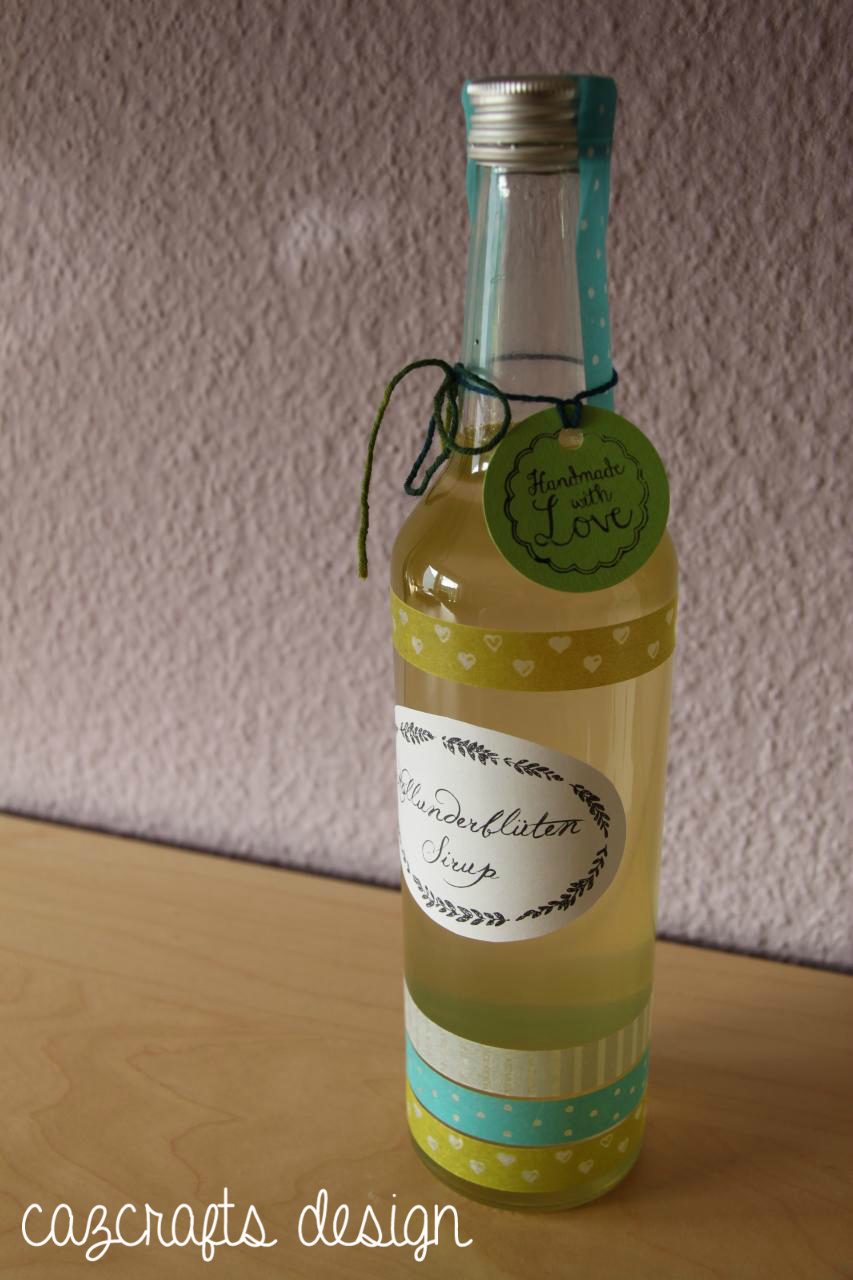
Und so sieht das Ergebnis aus. Eine Flasche haben wir behalten und eine Flasche lieben Freunden nach München mitgebracht.

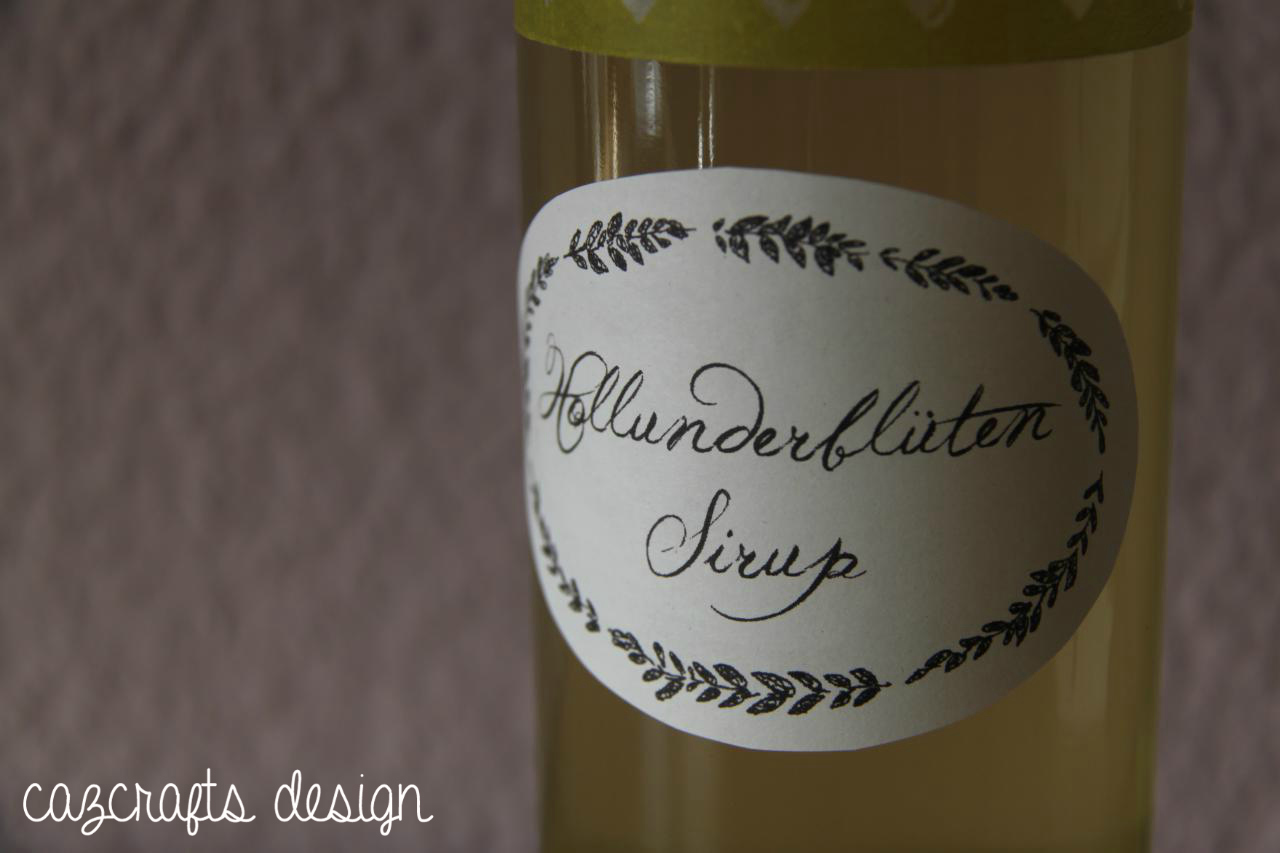
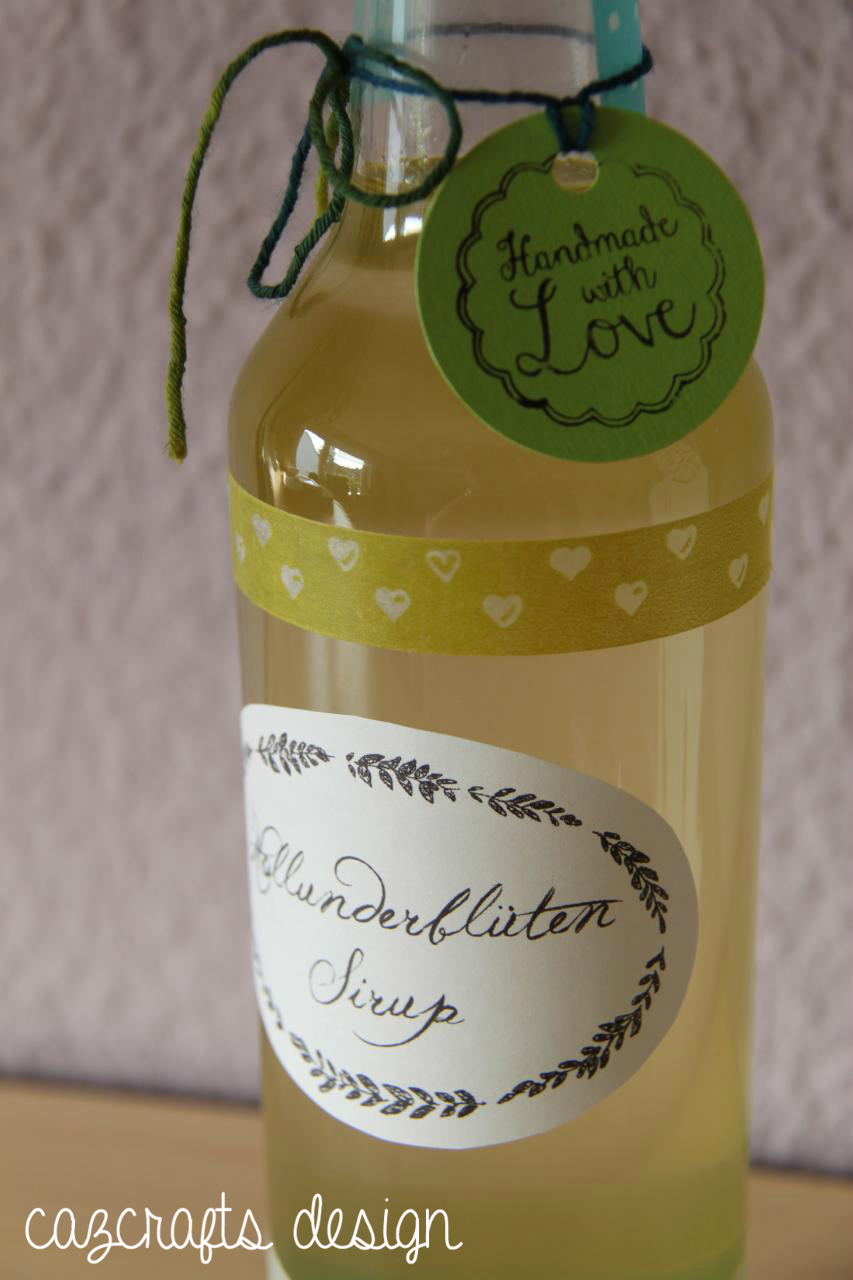
Dekoriert habe ich die Flasche mit Washi Tape das ich kürzlich mal bei Tchibo gekauft hatte. Das Label habe ich in Illustrator kurz selbst gemacht. Die Grafik für den Kranz aus Blättern gibt es als Freebie von welivedhappilyeverafter.com. Und das Handmade with Love Label hatte ich hier ja schon mal vorgestellt.

hollunderblütensirup1

hollunderblütensirup3

hollunderblütensirup2

Veröffentlicht am

Kinderzimmerdeko

Lukas‘ Kinderzimmer ist natürlich schon lange eingerichtet. Der kleine Mann ist ja schon 1,5 Jahre alt (wie die Zeit vergeht!) Aber ich habe euch bisher noch nie meine Kinderzimmerdeko gezeigt.

Die Prints über dem Bett habe ich selbst entworfen, in Adobe Illustrator „gemalt“ und bei einer Druckerei als Fotoposter ausdrucken lassen. Alle großen Prints in A4 sind von mir, die kleinen in Postkartengröße sind von IKEA. Es gibt noch ein weiteres Eulenposter, im Querformat. Das musste ich allerdings abhängen, da unterhalb der Giraffen und somit in Kinder-Grapsch-Hand-Reichweite war wenn der kleine Umtreiber im Bett steht…

Toll für A4 Drucke sind übrigens die IKEA Ribba Rahmen. Die haben ein schönes Passepartout.

Meine Drucke sind bei Interesse übrigens auch in meinem Dawanda-Shop käuflich zu erwerben 😉

Vor einiger Zeit wurde das Kinderzimmer noch um unsere Kuschel- und Leseecke erweitert. Der Lattenrost stammt aus meinem Bett – mir war der zu weich und musste daher weichen. Hier konnten wir ihn sinnvoll wiederverwenden. Darauf eine IKEA Matratze mit einem knallig grünen Spannbettlaken. Die Kissen haben selbstgenähte Bezüge. Darüber, damit das ganze auch schön gemütlich wird, ein grünes Moskitonetz das ich in einem Shop bei Ebay gekauft habe.

Et voila:

Falls sich noch jemand für die restliche Einrichtung interessieren sollte… Sie ist sehr IKEA-lastig, fällt mir gerade ein. Nur die zwei Hauptstücke, das Bett und der Wickeltisch, sind von Schardt. Nicht im Bild zu sehen ist außerdem ein 3m Pax Schrank, von dem 1,5m meine Handarbeitssachen einnehmen und sich auch gerne noch weiter ausbreiten würden… 😛 Außerdem zwei Expedit Regale mit jeweils 3 Türen. Ein Poäng Sessel, ein Teppich von IKEA (älteres Modell) und zu guter Letzt ist auch die Papierlampe natürlich vom Möbel-Schweden… Aaaaber, da es hier um die Kinderzimmerdeko geht, hab ich auf den Fotos nur den Ausschnitt mit Bildern und Kuschelecke drauf…

Veröffentlicht am

christening crafts

lukas will be christened on 7th july 2013. so some crafting was due 😀

invitations:

i bought a crafting book about birth and christening cards. on flipping through the book i found some designs i liked and only realized later that the author of the book was anja wägele, the same person who took the newborn photographs of our little lukas! 🙂

this is the book: kartenideen zu geburt & taufe

and i guess anja won’t be cross if i promote her a little, so have a look at her website: http://www.zebrahoernchen.de/

i love the „tree of life“ theme, so i made this design from the book. and also used the theme for the candle and for table decorations (no photos of that yet, obviously).

for the cards i bought matching cards and envelopes, used a stamp for the text, cut the trees from brown paper, created the leaves with a punch and used a variety of other items, like buttons, pearls etc… i found it quite tricky to glue the things to the card without makeing a complete mess. in the end i used a toothpick to apply tiny portions of glue to the pearls and stuff to avoid the glue from oozing out everywhere.

i’m very happy with the result indeed (and so were the recepients of the cards):

candle:

it is tradition to make a candle for the child that is christened. either by the parents or by the godparents. so it was a great opportunity to try candle design. 😉 i did a little research at pinterest etc. and collected some ideas. so here is what i came up with. i’m very happy with the result!

it was the first time i decorated a candle. and it was quite easy actually. you just get a candle and wax sheets of your choice and start. you can also buy prepared parts like letters, christian symbols etc. but i found them sooooo ugly! so everything on my candle is handmade. i drew my design on paper and then put this template on the wax sheet, redraw the lines with a pen so that the outlines of the shapes get visible. then i used a cutter to cut out the parts. i thought it might be difficult to put the parts on the candle, but wax just sticks on wax, so no problem with that at all. if you just give light pressure you can reposition the parts, and a little more pressure to attach them permanently.

Veröffentlicht am

custom changeable iphone cover

after having seen changeable iphone covers on pinterest a few times i wanted to make my own.

so i ordered a clear case for my iphone 4s on ebay for about 2-3€. i reused the „paper-iphone-dummy“ that came with the iphone cover, cut a hole for the camera with an exacto knife and tadaaaaa, template finished.

the tools:

the template:

the paper. i used some christmas paper from my stock and also bought new scrapbooking paper. the green stack paper is soooo adorable. little birds, beevers, flowers, leaves… so cute. have a look at the designs the stack contains…

using my knife and the template i cut these three iphone case inlets. i have to admit it wasn’t easy to cut the camera holes properly. they all look a little messed up, but you can hardly see that once the paper is inside the clear case:

and here you can see my iphone all „dressed up“ with its new bird cover:

easy, cute and inexpensive. well, if you already have a huge stash of scrapbooking paper anyway. i had to buy the green stack paper which cost me about 18€ (not exactly a bargain). but i fell in love with the paper the moment i saw it and it won’t be the last time i use this paper. for more iphone cover inlets or other crafting ideas…

i just hope the clear case plus quite heavy weight scrapbooking paper doesn’t interfere with the reception. a friend called me earlier and i couldn’t understand her very well. but i’m not sure if it’s because of my new case – according to the iphone’s display the reception is fine… will have to have a closer look at that…

Veröffentlicht am

easter

i admit it, i love decorating. especially for christmas. but easter’s good as well 😉 flowers and trees start to blossom, the world gets more cheerful and colourful. and i also like to have some spring spirit in our flat. with fresh flowers and decorations.

so this is what i made recently. i actually had a lot of material so i made a second one exactly the same as a present… i will hang it at the door of our flat…

pattern: the pattern is actually by the same lady that also invented the pattern for the christmas decorations i did before. remember? here some details about the book: „Bunter Oster-Bastelspaß: Ideen für Ostereier und Dekorationen“ by pia pedevilla

materials: construction paper in several colours, crayons to colour the chick, wire, plastic eggs (they should have been painted according to the pattern, but i was lucky and found eggs with exactly the right colours so i didn’t bother), feathers, wooden beads in white/purple/green. oh and i was very lucky to have a glue gun – otherwise it would have been almost impossible to attach the chicken to the wreath.

Veröffentlicht am

christmas handicrafts

i loooove christmas. it’s my favourite time of year. and it’s still a little early, but here are some christmas decorations i made some time ago. i saw the book on amazon and just HAD to make some of the gorgeous patterns!

these two little angels (carolin & tim angels 😉 ) will go on the door of our flat with a welcome sign:

no idea where these tiny guys will be put up, but i’m sure i’ll find a place. maybe i’ll make some more as presents… tim wanted to help too so he cut out the angel parts:

Veröffentlicht am

springerle

the next cookies are finished. these are springerle, my dad’s favourite christmas cookies. so tim and me were saturday, sunday and monday. yeah, 3 days! the first day you make the dough, which you have to stir for 20 minutes. the second day you prepare the cookies and put them on baking sheets to dry. the third day you bake them. it’s like „the first day of christmas…“ *sing“ „the first day of springerle…“ 😀

springerle are very „old“ and traditional cookies from the south of germany and switzerland. they were already made in the middle ages on christmas and special occasions as christenings, weddings etc. the molds i have are modeled after traditional ones but are made of some kind of synthetic resin (which makes them more resistant and easier to clean).

here you can read more, in case you’re interested.

making springerle is almost an art form, so i’m very proud of the result. 🙂

here you can see the springerle before baking. they don’t have „feet“ yet.

when baking, the dried top with the images doesn’t change, but the still damp bottom rises and they get their characteristic „feet“. if they don’t get any (usually they double up in height) or the images disappear – you have failed 😉

thanks to tim for helping. i award you honorary swabian 😛

Veröffentlicht am

nougat tuffs

baking cookies is kind of crafty too, isn’t it?!

so nougat tuffs it was! we were in the baking mood yesterday…

may i present you: the dough

there’s no way making cookies without powerful tools. *harr harr harrr*

concentration please:

at that point they were still looking good. until we let them burn in the oven. doh!

but there was enough left to glue together with nougat and sprinkle with chocolate. yummy.

they had to dry first so we’ll eat the first ones tonight with a delicious starbucks dark cherry chocolate latte (sit at starbucks and sneak our own cookies in). well, not exactly the first ones as we already nicked some yesterday but hey, you get the idea… 🙂