Veröffentlicht am

Bagger-Tshirt

Mein Sohn ist ein riiiiieeeesiger Bagger-Fan. Das meistgesagte Wort pro Tag ist wahrscheinlich „Bagger“. Knapp gefolgt von „Mann“, „Auto“, „Mama“, „Papa“ und „Mimi“ (= Schnuller)…

Da braucht das Kind natürlich auch ein Bagger-Tshirt und was läge da näher als selbst eins zu nähen.

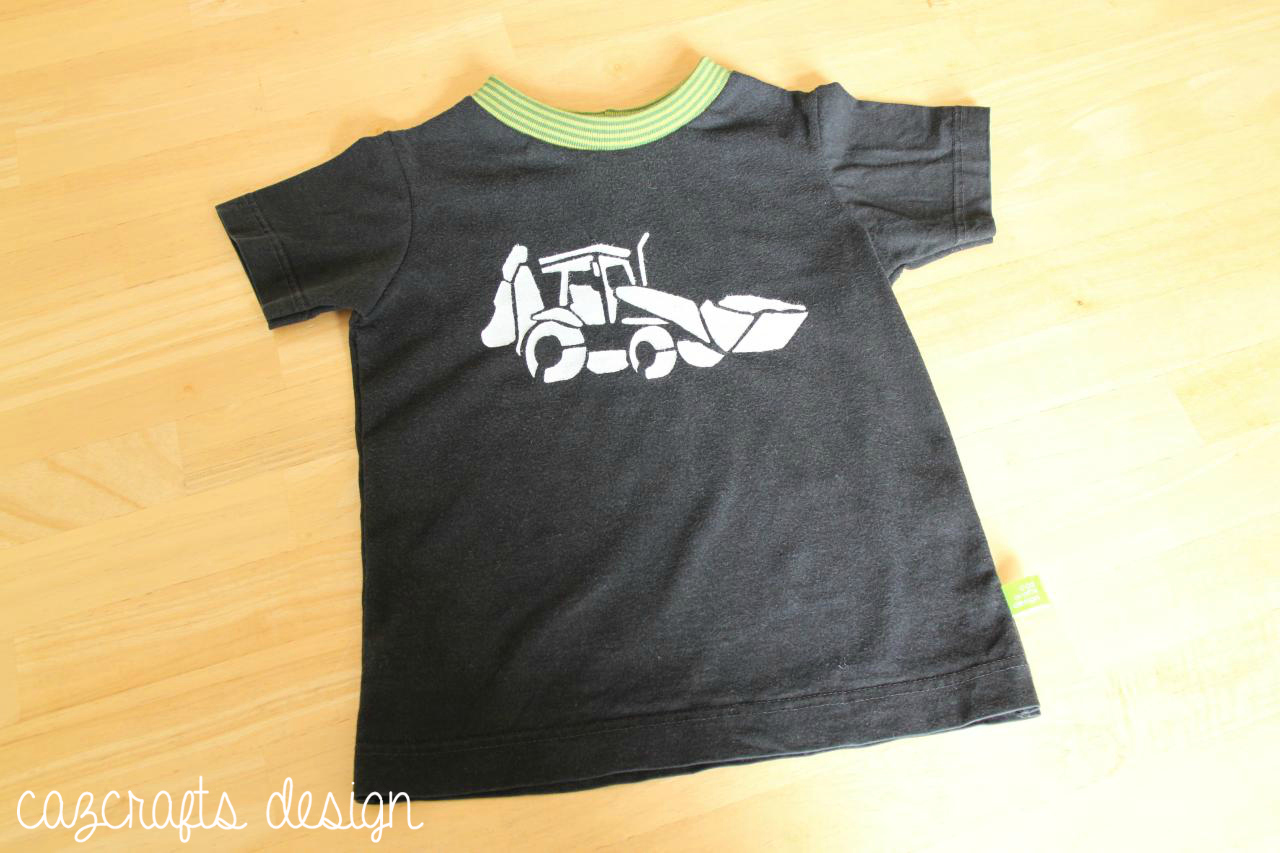
Hier ist das gute Stück:

baggershirt1

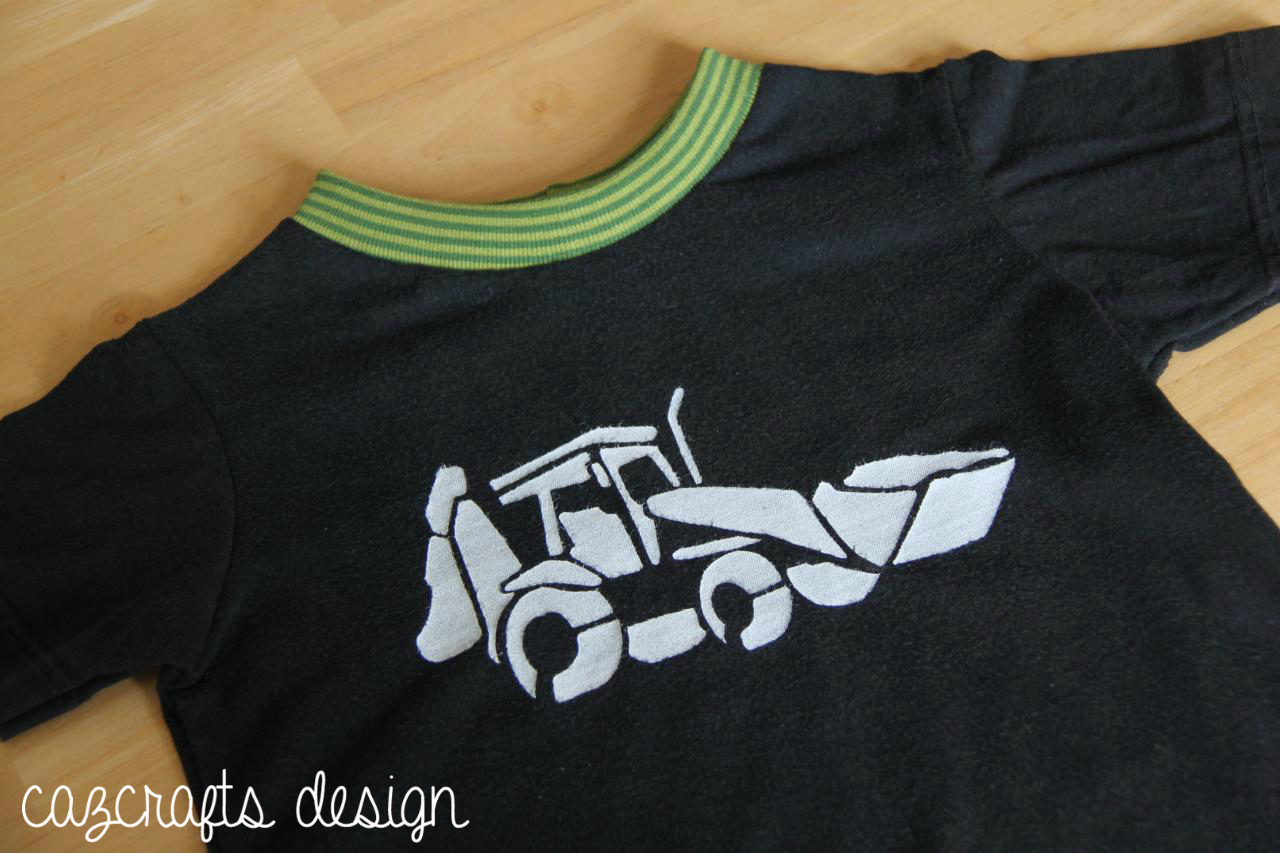
Und der Bagger in Großaufnahme:

baggershirt2

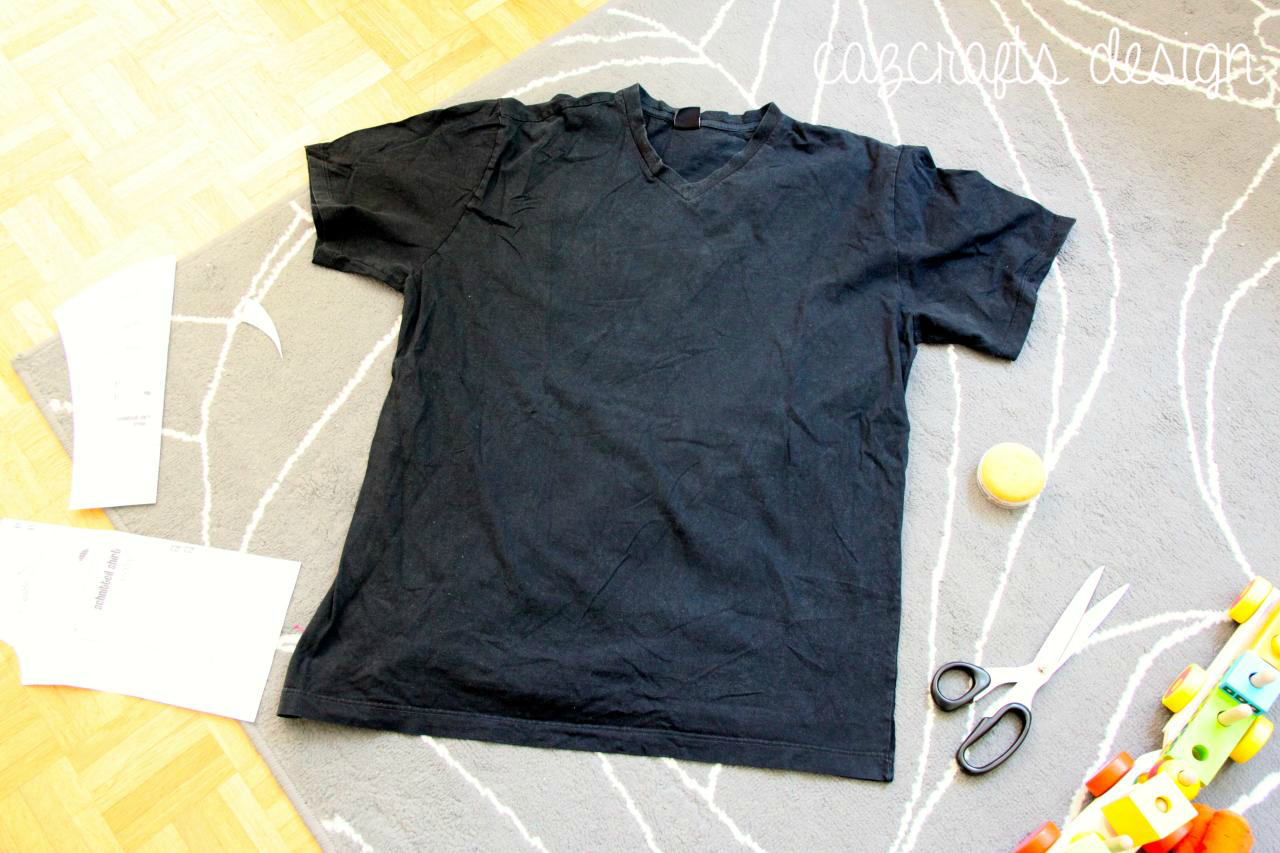
Dieses Shirt ist aus einem alten, löchrigen Tshirt von Tim entstanden, das ich zerschnitten habe. Dabei habe ich den Saum am Arm und unten einfach direkt übernommen und musste dann nur noch den Halsausschnitt mit Bündchen versehen.

baggershirt5

Dann habe ich mir eine Schablone mit Baggermotiv angefertigt (anhand einer Grafik die ich in der Google-Bildersuche gefunden habe).

baggershirt8

baggershirt6

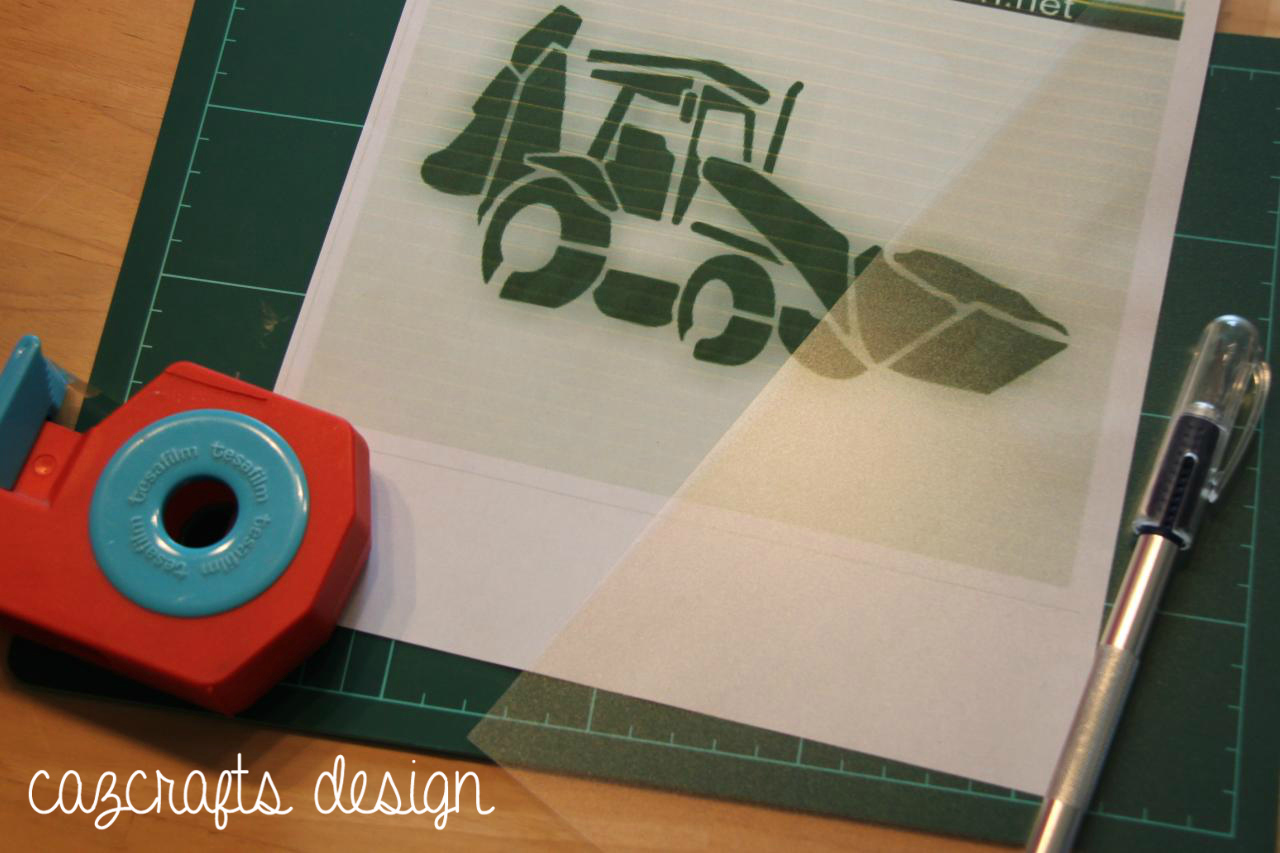
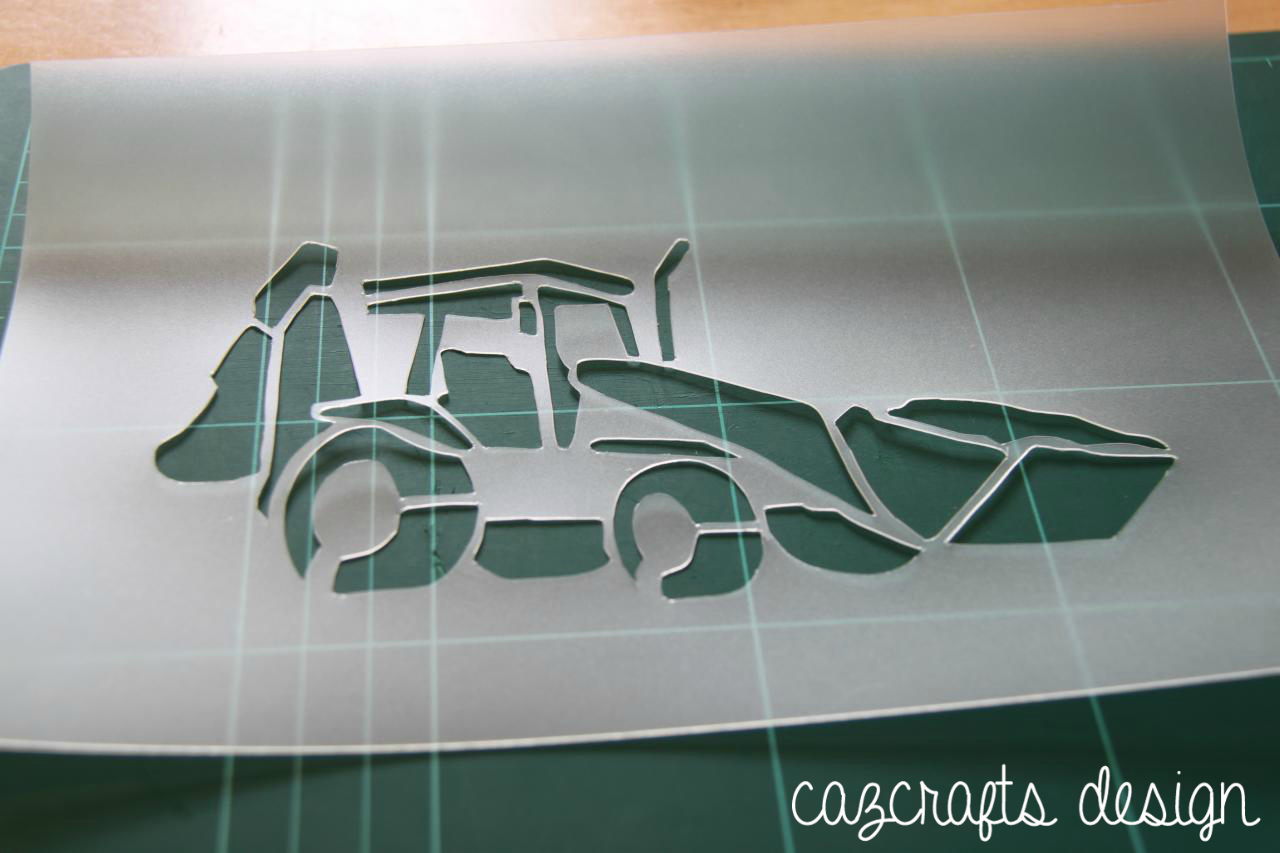
Die Schablone wurde mit wiederablösbarem Sprühkleber auf der Vorderseite des Shirts befestigt und dann mit Stoffmalfarbe bemalt (mit Schablonierpinsel und einer kleinen Schaumstoffrolle).

baggershirt4

baggershirt3

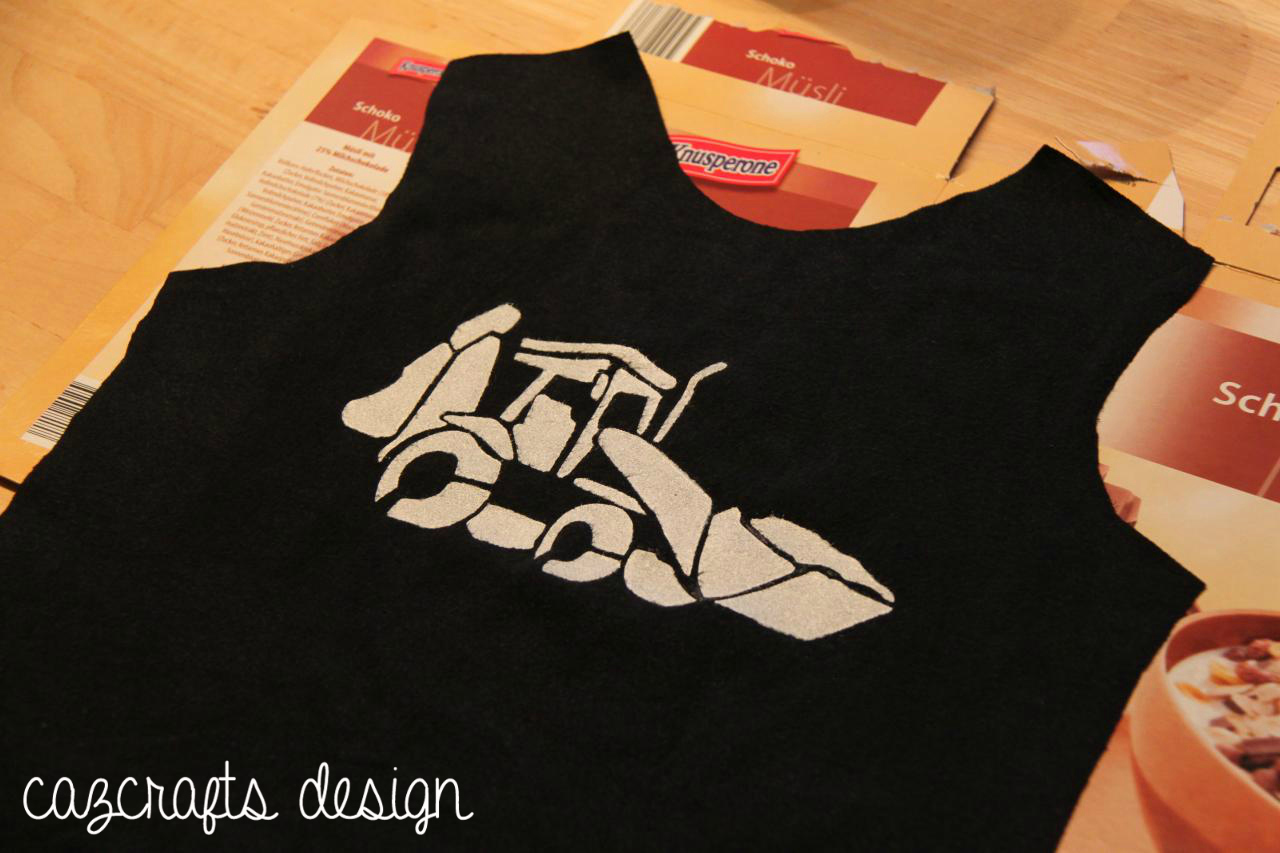
Das ganze habe ich dann noch mit dem Bügeleisen fixiert und die Schnitteile zu einem eaSy-Shirt von Leni Pepunkt vernäht. Wie findet ihr’s?

Auf mit dem Baggershirt zu Made4Boys, Kiddikram und Creadienstag!

Veröffentlicht am

iRock – ipod cozy

felt it was time for a new ipod cozy… i got bored with my old, ugly rubber one and don’t like just tossing my beauty in my bags… so i came up with this rocking little cozy 😉

unfortunately i found out that felt isn’t great to stencil on. due to the texture of the fabric the paint soaks under the stencil a little.

but anyway: it’s pink, it’s stencil, it’s rock’n’roll!

i thought about making a whole bunch of these and sell them on etsy/dawanda shop. in all kinds of colours and with all kinds of messages… iRock, iPop, myPod, iDance,….

what do you think?! 🙂

Veröffentlicht am

vince noir – rock’n’roll star

i used my „noir“ mighty boosh stencil again to make another booshy shirt! this time a quite summery one…

i love how it turned out and i’ll wear it with pride although hardly anybody knows the boosh in germany. but it’s a cool shirt anyway 🙂 at least the scotsmen will recognize it on our scotland trip (where we hopefully have good enough weather to wear tops at all 😉 )

Veröffentlicht am

mighty boosh swap – what i sent

phizzychick finally recieved my boosh parcel, so i can publish the stuff here too without spoiling the fun 🙂

  • fingerless mittens with mighty boosh logo
  • mirrorball suit mirror
  • two of howards'(elbow) patches
  • beaded vince and polar bear „did you say hold me?“ – „no“
  • naboo’s miracle bath jelly
  • a packet of soup, soup, a tasty soup, soup, a spicy carrot and coriander… (not on photo)

more photos at flickr

Veröffentlicht am

2nd stencil project – “Bob Dylan”

story: the second try with stenciling. since my brother really likes bob dylan i did this for his birthday. i hope he likes it!

material: olive 5€ shirt from h&m, 0.3 mm overhead transparency, sharp cutter knive, black fabric paint for dark fabric, stencil brush, „painter foam rubber roll thingy“, sticky tape, spray mount, electric iron

technique: prepared a stencil image in photoshop, used a 0.3 mm overhead transparency and cut out the bits that should be coloured later, sprayed the stencil with spray mount, put it on the shirt and painted it with black fabric colour (for dark fabrics). this time i used one of these little „painter foam rubber roll thingies“ to apply the color to the shirt, which worked quite nicely. a lot more smooth and steady than with a brush.

The photo looks quite patchy, but that’s just because of the flash. the colour on the shirt looks smooth 🙂

Veröffentlicht am

1st stencil project – „noir“

story: i wanted a tshirt of the mighty boosh for ages! but i didn’t like the official boosh shirts and – hey, not everybody fits in a skinny xs tshirt anyway! so i first thought about ordering tshirts (–> expensive), using these printer/iron on fabric thingies (bad quality) and finally ended up stenciling and printing my own shirt 🙂

material: black 6€ shirt from h&m, 0.3 mm overhead transparency, sharp cutter knive, white fabric paint for dark fabric, stencil brush, sponge, sticky tape, spray mount, electric iron

technique: prepared a stencil image in photoshop, used a 0.3 mm overhead transparency and cut out the bits that should be coloured later, sprayed the stencil with spray mount, put it on the shirt and painted it with white fabric colour (for dark fabrics). i used a stencil brush and a sponge to apply the colour, but i’m not not satisfied with that method yet as it turned out very patchy… i’ll try something else next time…