Veröffentlicht am

KAPUTZiert die Erste

Ich bin gerade ziemlich im Nähfieber. Und da habe ich aus geschenkten Sweatshirt-stoff-Resten (danke Godi!) und Jersey-Schätzen diesen KAPUTZiert Kaputzenpulli von Leni Pepunkt genäht. Ist Größe 92 und passt Lukas recht gut.

„Recht gut“, weil ich den Halsausschnitt für den Dickschädel größer gemacht habe als er im Schnittmuster angegeben war. Was sich als garnicht so einfach herausstellte, da die Kaputze dann ja auch wieder um den Halsausschnitt passen muss. Das war etwas frickelig für mich als Anfänger-Schneiderin… Außerdem habe ich einen dummen Denkfehler gemacht und die Armbündchen einfach laut Schnittmuster zugeschnitten obwohl diese für Bündchenware und nicht für Jersey ausgelegt waren. Tja, und jetzt sind die Armbündchen ziemlich eng. Man kann den Pulli schon tragen, das ist nicht das Problem, aber bequemer wäre es, wenn ich das weiter zugeschnitten hätte. –> merken fürs nächste mal. Die Bündchen sind übrigens so lang damit sie mitwachsen können. Momentan passt der Pulli mit hochgeschlagenem Bündchen, später dann mit runtergeklapptem.

Ansonsten gefällt mir der Pulli sehr gut. Ich finde die Stoffkombi sensationell. Haha, Eigenlob stinkt… 😛 Wird sicher nicht der letzte KAPUTZiert bleiben!

Aber seht selbst:

Ich mache vielleicht bald noch mehr Fotos im getragenen Zustand.

Außerdem wird das mein erster Eintrag für Made4BOYS. Juhu!

April

Veröffentlicht am

Taschentuechertasche (Tatueta) – die Anleitung

Dieser Post ist eine mehrfache Premiere! Das erste eigene Schnittmuster (wenn auch nur für ein kleines Projekt), der erste Kreativzirkelbeitrag, und der erste Beitrag auf meinem Blog in Deutsch.

Taschentüchertaschenanleitungen (was für ein Wort!) und Schnittmuster gibt es wohl schon wie Sand am Meer. Warum noch eine weitere? Einfach weil ich noch nicht die für mich optimale gefunden und mir daher selbst ein Schnittmuster gemacht habe. Und da das für mich so gut funktioniert, wollte ich euch an meinen Erfahrungen teilhaben lassen. Vielleicht hilft es ja noch jemandem weiter 🙂

Und hey, gibt es etwas anderes  was mit so hoher Wahrscheinlichkeit in jeder (Frauenhand-) Tasche zu finden ist wie ein Päckchen Papiertaschentücher? Also, warum sollte man dann das, was man jeden Tag nutzt, nicht ein wenig aufhübschen. Oder? 😛

Denn wenn man die Taschentücherpackung eine Weile herumgetragen hat, dann klebt der Verschluss nicht mehr, die Seiten der Verpackung gehen auf, die Taschentücher sehen verratzt aus und das ganze wird einfach unansehnlich.

Dafür bietet dieses Tutorial die Lösung! Eine hübsche, stabile und wiederverwendbare Taschentüchertasche, kurz Tatüta.

Obendrein ein super leichtes und schnelles Projekt. Sehr anfängergeeignet und mit Suchtpotenzial. Mach mit und nähe dir selbst eine… oder zwei… oder ganz viele!

Du brauchst folgendes Material:

  • Wachstuch(reste)
  • Schrägband
  • Nähmaschine
  • Faden
  • Schere
  • Schnittmuster
  • ggf. Klammern

Dann kanns losgehen:

ACHTUNG: Bei Wachstuch darf nicht mit Nadeln festgesteckt werden, da man sonst später die Einstichlöcher sieht! Falls benötigt, kannst du mit Klammern feststecken. Ist bei einem so kleinen Projekt aber nicht unbedingt notwendig – einfach festhalten und losnähen.

Das Schnittmuster auf 100% ausdrucken und anhand des mitgedruckten Maßstabs überprüfen ob die Größe stimmt. Dann die Form innerhalb des gepunkteten Rahmens ausschneiden. Im Schnittmuster ist bereits eine Nahtzugabe von 0,7cm (Füßchenbreite) enthalten. Aus dem Wachstuch ausschneiden.

Zwei Stücke Schrägband in der Länge der kurzen Seite (15cm) zuschneiden.

Das Schrägband an den kurzen Seiten annähen. Bei mir funktioniert das super wenn ich das Füßchen rechts genau am Rand ausrichte.

So sieht das dann aus:

Die kurzen Seiten rechts auf rechts in die Mitte falten, so dass sich die Schrägbänder in der Mitte treffen. Füßchenbreit absteppen. Ich nähe dabei immer einmal hin und einmal zurück, damit die Öffnung auch bei längerer Benutzung nicht aufreißt.

So sieht das fertig aus:

Jetzt sind die Ecken der Tatüta dran genäht zu werden. Dazu werden erst die Ecken aufgefaltet:

Und füßchenbreit abgesteppt. Auch hier einmal hin und her nähen. Dabei muss man möglichst sorgfältig arbeiten, da die Kanten des Tatüta sonst schief werden!

Und jetzt ist es auch schon fast geschafft. Auf rechts wenden, mit Taschentüchern füllen, freuen und aufs erfolgreiche Projekt einmal kräftig die Nase putzen! 😀

Mehr meiner Werke gibts im vorigen Post zu sehen…. Viel Spaß beim Nachnähen!

 Loading InLinkz ...
Veröffentlicht am

Viele, viele Tatueta

Hier sind sie. Wie angekündigt ist hier das erste Projekt aus meiner Wachstuch-Restebox von www.wachstuchverkauf.de / www.tischdecken.pro. Die Taschentüchertaschen, kurz Tatüta, waren einfach prädestiniert für die Stoffstücke die ich hatte. Denn man braucht nur kleine Mengen für ein Täschchen. Gerade mal 15cm x 17,5cm. Und dadurch, dass ich viele unterschiedliche Muster hatte, konnte ich mich mit den Täschchen farbenmäßig natürlich auch austoben. Passendes Schrägband/Garn dazu und fertig ist die Tatüta 🙂

Das Restultat:

Im nächsten Post werde ich eine Anleitung inklusive Schnittmuster für die Tatütas schreiben die auch mein erster Artikel für den Kreativzirkel sein wird 🙂 Ich freu mich drauf!

Veröffentlicht am

blog language / blog-sprache

i thought about this for a while and have made up my mind now 😉 i’m going to continue my blog in german.

if i write any knitting patterns, sewing patterns or tutorials of any kind i will write them in german and english.

any objections? 😉

Ich habe mir darüber jetzt einige Zeit Gedanken gemacht und habe beschlossen, dass ich meinen Blog in deutsch weiterführen werde.

Wenn ich Strickmuster, Schnittmuster oder sonstige Tutorials poste, dann werde ich das sowohl auf deutsch als auch auf englisch tun.

Irgendwelche Einwände? 😉

which language should my blog be in? / Welche Sprache sollte mein Blog haben?
2 votes · 0 answers
Veröffentlicht am

wachstuch wahnsinn – oil cloth madness

bisher habe ich noch nie mit wachstüchern genäht. hatte es aber schon immer vor und hatte im internet viele tolle, interessante projekte gesehen.

so far i never sewed with oil cloth. but i always wanted to as i have seen a lot of interesting projects and ideas on the web.

beim blog-browsen im netz habe ich bei einer nähbloggerin gelesen, dass www.wachstuchverkauf.de / www.tischdecken.pro eine aktion hat, bei der man als blog-autor kostenlos eine restekiste mit wachstüchern bekommt, wenn man danach darüber schreibt und vielleicht auch noch fotos der entstandenen projekte postet etc…. der blog-eintrag war allerdings schon ca. 2 jahre alt und ich wusste garnicht, ob es dieses aktion noch gibt. also schrieb ich eine anfrage an die angegebene kontaktadresse und bekam innerhalb kürzester zeit (weniger als eine woche) rückmeldung, dass man mir ein paket schicken würde. und schwups, am 26.2.14 hatte ich die dhl versandbestätigung und am 27.2.14 war das restepaket schon bei mir!

when browsing other blogs i found a sewing blogger who rote about a campaign from www.wachstuchverkauf.de / www.tischdecken.pro where you can get a box with oil cloth scraps for free if you are a blogger and are willing to write about the box, link their url and maybe post photos of projects you made with their fabric…. but the blog post was already 2 years old and i didn’t know if the campaign still existed at all. so i just gave it a try and sent a mail to their contact email address. i got a reply within less than a week that they would be happy to send me a box. on february 26th 2014 i had the dhl dispatch confirmation and on february 27th 2014 i already had my scraps box!

mann war ich neugierig! ein riesiges und ganz schön schweres paket mit dem netten hinweis dass basti mir viel spaß wünscht. danke, werde ich haben 😀

oh boy, i was excited and curious! it was a huge and pretty heavy parcel with the nice comment of basti to have fun. i will, thanks! 😀

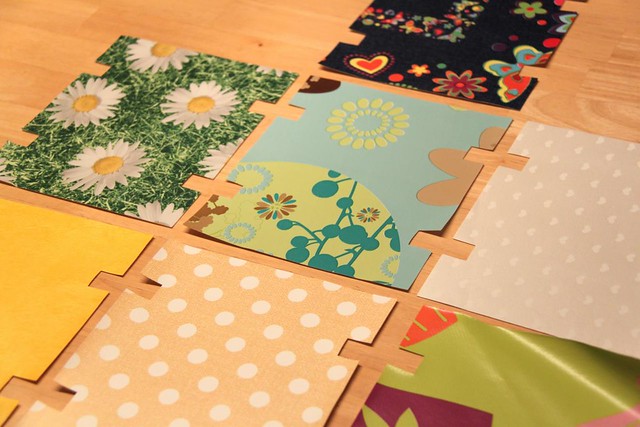
also packte ich erstmal das paket aus und sortierte etwas nach farben. hier die übersicht über alles was in meiner restekiste zu finden war:

so i had a look inside, and this is what i got (sorted roughly by colours):

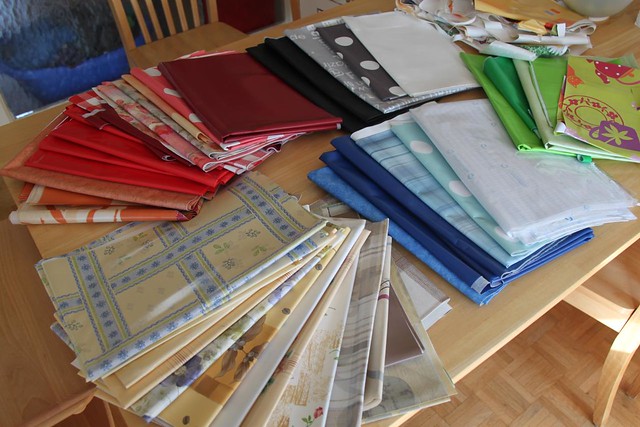
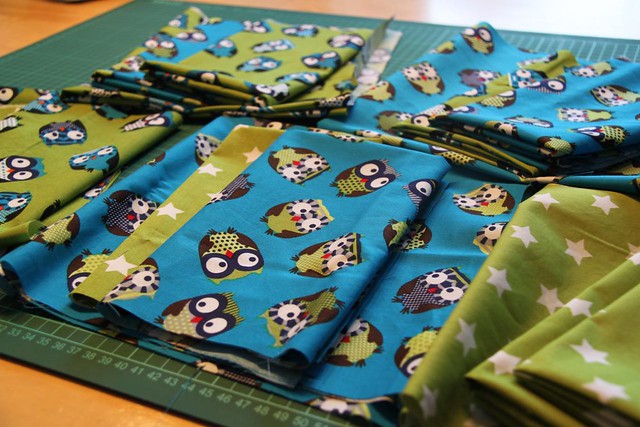
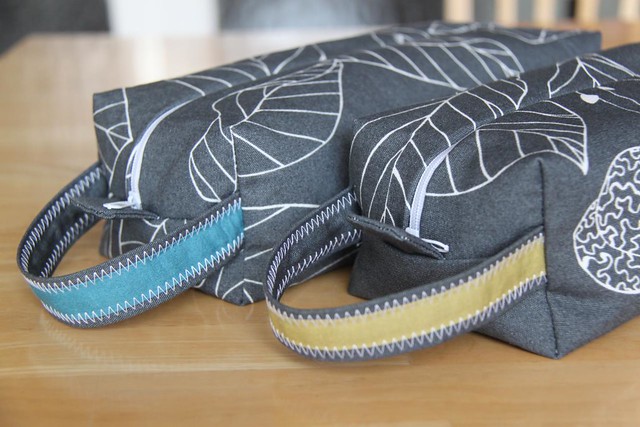
im hintergrund sieht man einige kleine schnipsel die vom zuschneiden von runden tischdecken übrig geblieben sind. ansonsten sind doch auch sehr große stücke dabei! daraus lässt sich richtig etwas machen 🙂 ich denke da an messenger bag, kosmetiktäschchen, kindergartentasche und co… die farben sind nicht alle so meins, vor allem die aus der beige/gelb-ecke, aber der rest ist doch sehr vielversprechend.

in the background you can see little scraps from couting round table cloths. but apart from that there are some really big pieces. enough to really be able to do something decent with it! i’m thinking messenger bag, little cosmetic bags, kindergarden bag for lukas and so on… not all the colours are my favorite though. especially the beige/yellow ones but the rest looks quite promising!

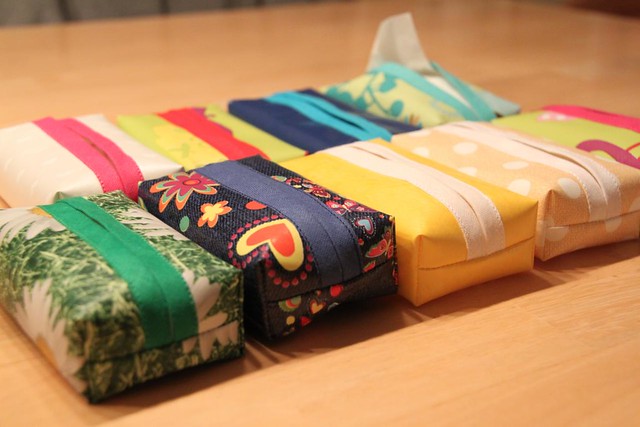
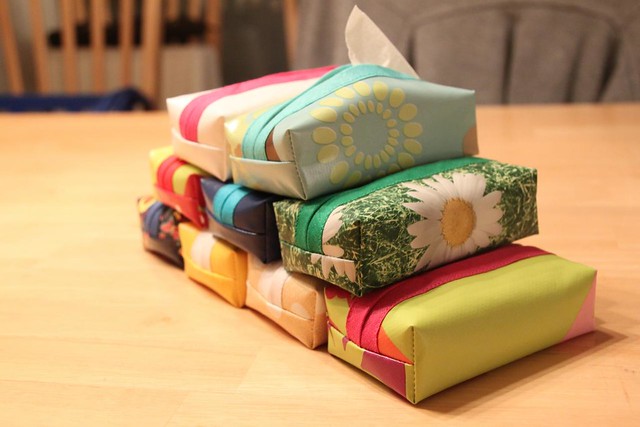
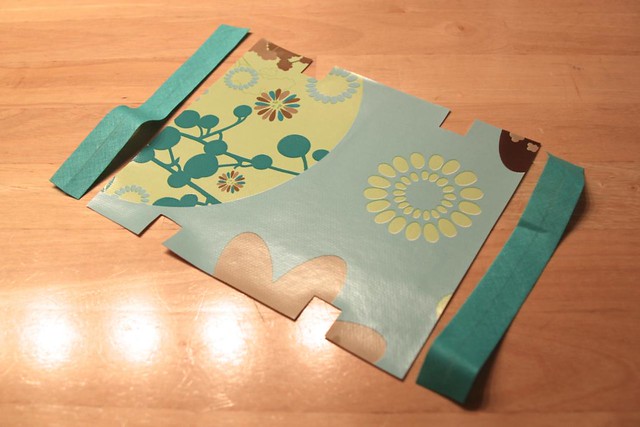
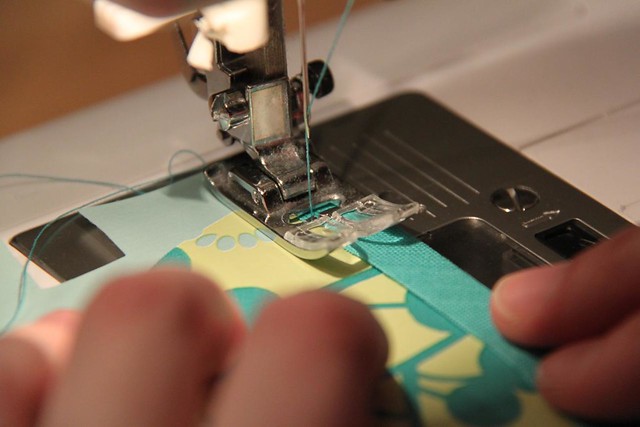
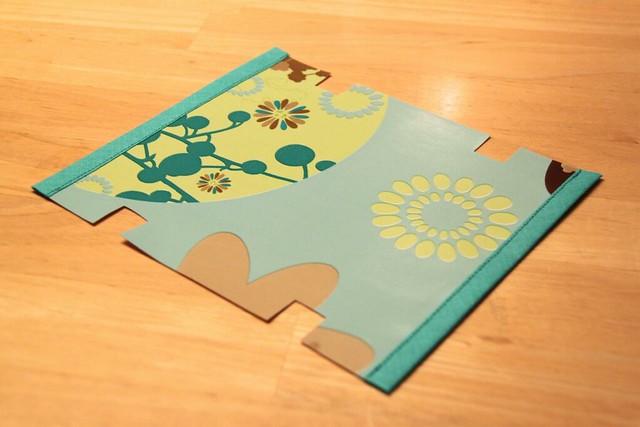
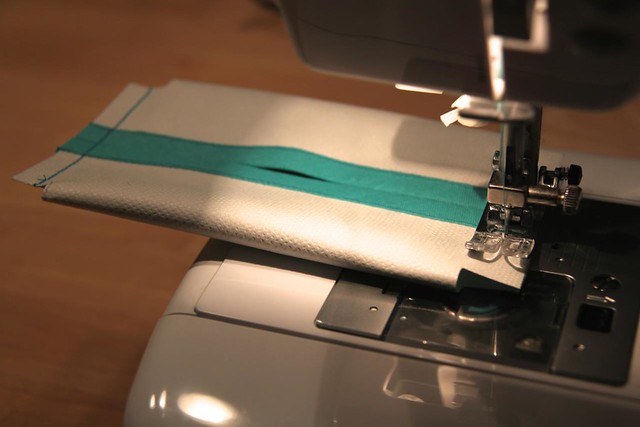
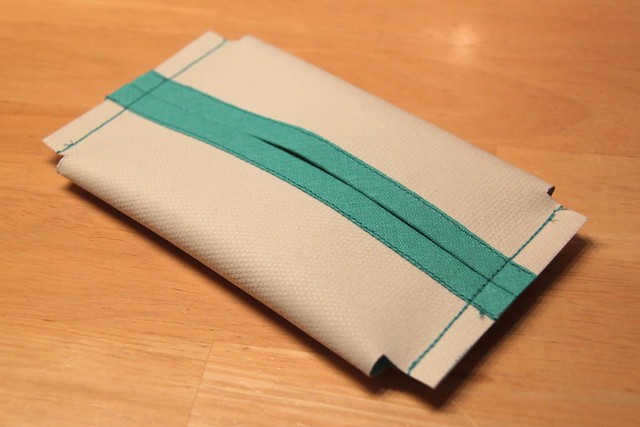
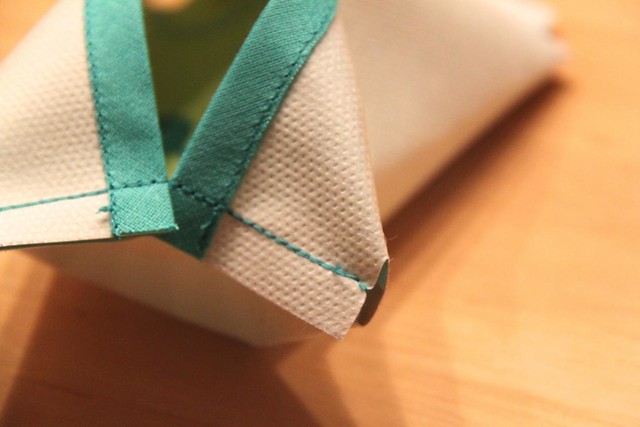
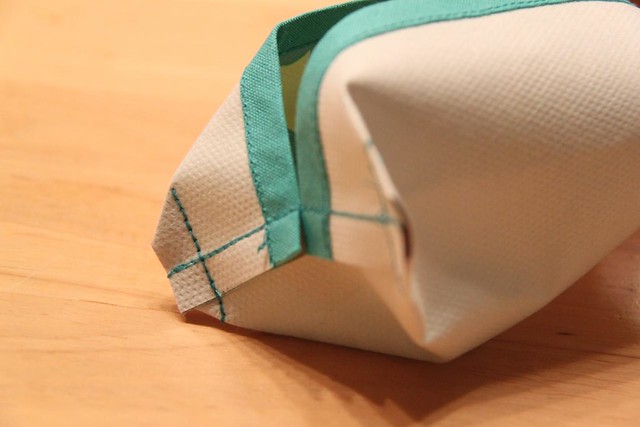
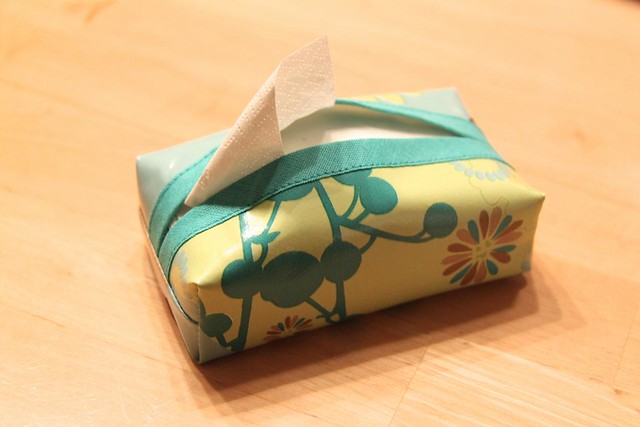
die ersten versuche habe ich auch schon gemacht und einige taschentüchertäschchen (tatütas) genähnt. darüber gibt es aber bald einen separaten beitrag! 🙂 ich werde noch einige mehr produzieren und meine ergebnisse dann, inklusive meines schnittmusters, dann posten…

the first tests have already been made. i made some tissue bags but i won’t show them now. there will be an extra blog post for that. 🙂 i’ll make some more and then post the result seperately, including my pattern.

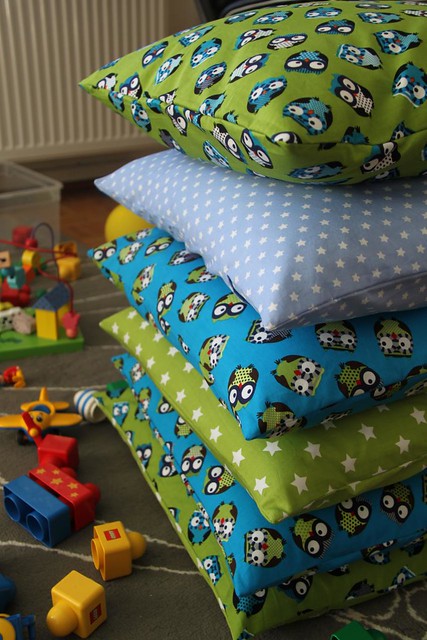
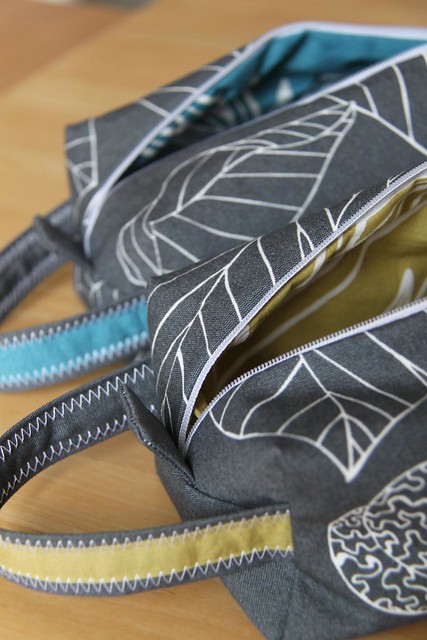
als nächstes steht dann ein kleines kosmetiktäschchen auf dem plan, damit lukas seine eigene tasche für seinen kram (dusche/shampoo, creme, nasentropfen, nagelklipser, zahnbürste, zahnpasta etc) hat wenn wir verreisen… man darf auf weitere resultate gespannt sein!

after that i’ll make a little cosmetic bag for lukas so he’ll have his own bag for his stuff when we travel. you can look forward to seeing more oil cloth projects soon!

also wenn ihr auch lust auf wachstüchernähen habt, dann nichts wie mailen an anfrage@wachstuchverkauf.de … was euch so erwartet könnt ihr ja auf  www.wachstuchverkauf.de und www.tischdecken.pro nachlesen. viel spaß!

if you are interested in sewing with oil cloth yourself, then send an email to anfrage@wachstuchverkauf.de … have a look at www.wachstuchverkauf.de and www.tischdecken.pro to see what you can expect. have fun guys!

Veröffentlicht am

owl pillow cases

i sewed 6 pillow cases for the cuddle/reading corner in lukas room which i’m setting up at the moment. i’m planning to do it all in bright green and blue colors and browsed dawanda for suitable fabric. and i found lovely owl fabrics on turquoise and green, green fabric with white stars and light blue fabric with small stars. since i’m not a huge fan of zippers, i used this tutorial for zipper less pillow cases which really was easy to follow and worked out really well!

sewing 6 pillow cases from the same pattern gets boring easily though. you have to sew round all the single parts with zigzag first and then assemble everything. so 18 parts in total. sometimes i wish i had an overlock machine 🙁

i have to say the pattern is very forgiving. i made some mistakes, produced some crooked seams and once i had the needle positioned differently (to the very left) and didn’t notice until 2 seams were finished – so the pillow case turned out slightly smaller than the rest. but you don’t see any of the mistakes in the finished pillow cases. 😛

that’s the fabric after i cut it:

and this is the result. 6 lovely pillow cases. the fillings are cheap ikea pillows:

don’t you just love those owls? i sure do!

the back of the pillows is made of two colors. otherwise it wouldn’t have worked out. i just had 1m of each fabric and that was just enough to cut 2 fronts and 3 back parts… so i mixed it all up and love the result:

Veröffentlicht am

knitting bags aka „will sew for sushi“

well, this is the proof: i will sew for sushi 😛

my friend reingard saw what i had been sewing for lukas and asked if i could make her a bag for her knitting projects. i said „sure, if you invite me over for some yummy self-made sushi“. well, the bags are finished – we just need to set a date for the dinner i guess 😉

i had a look at free patterns online and found this one from machwerk. i was a little nervous about the zipper because i had hardly used any so far. apart from that it looked pretty streight forward. and i thought if i do the work anyway, i could make a bag for me too. there are never enought knitting bags because there are never enough knitting projects. 😉

the fabric is 100% ikea which i already had in my stash. on the outside a sturdier one, grey with white leave pattern. on the inside fabric with a plant pattern on light green and in the other bag on turquoise.

the pattern was really easy to follow. i think i’ll do this again…

but the next sewing projects are pillow cases for lukas‘ new „cuddle corner“ 🙂 a prototype is already finished and since it worked well, more are coming. i’ll keep you posted!

Veröffentlicht am

follow your arrow mystery kal shawl

this shawl project was crazy! my first kal (for all the muggles out there, this means knit along) and even a mystery kal. that means there were 5 clues, one released every week and you didn’t know how it would go on. and even more: in every clue there were 2 options you could follow. this means there were 32 possible shawls from one pattern! the clues all were totally different. some easy, and some challenging.

i followed the clues aabab. so 1a, 2a, 3b, 4a, 5b. there was no special plan in this, i just followed whichever pattern sounded the most interesting, challenging or that i thought would match the rest of the shawl.

clue 5 was really, really hard for me. because it was totally different from what i knit before.

i’m not really sure if i like the result. maybe i’m just too narrow minded and can’t handle an asymetric shawl 😉 maybe i should have done 1b which sets determins that the shawl will turn out a lot more semicircular. 5b is asymetric as well. i also find it a little strange that 1a (the piece with garter stitch and stockinette stitch stripes) doesn’t seem to go too well with all the lace that follows… hm…

what i really liked is the community feeling, sneaking a peak at other knitters‘ shawls and being able to ask questions if anything isn’t working out. it won’t be my last (m)kal. 🙂

pattern: follow your arrow mystery kal by ysolda teague

yarn: about 1.5 skeins of old maiden aunt merino superwash. colorway bluebelles.

needles: 4.0 mm

here is the result:

Veröffentlicht am

the danish forests cowl

this was a really fun project. my christmas knitting project 2013. started 20th december and finished 7th january. normally i don’t have much time to knit on a normal day. just a few hours max after lukas is in bed. but over christmas there were grandparents to entertain the little bugger so i had a little more knitting time.

the yarn of this cowl is so LUSH! i can’t get over it. it’s cosy and warm and just aaaaawwww! i bought this yarn on our trip to new zealand and it contains 60% merino and 40% possum. i guess that’s what makes it so soft and cosy. i can also highly recommend the pattern. it’s easy to knit and memorize without ever getting boring. perfect for knitting in front of the tv.

i did 25 repeats of the leaf pattern. the wavy pattern has 10 rows, the leaf pattern has 16 rows. –> so the least common multiple is 80 rows. –> this equals 5 repeats of the leaf pattern. –> so any multiple of 5 leaf repeats works fine!

i never blocked this project because i liked the texture the way it was. and i didn’t want it to become longer. it is just perfect for wrapping it round the neck twice.

pattern: the danish forests by marte eldøy

yarn: touch yarns possum merino naturals in beige

needles: 4.5mm

Veröffentlicht am

slouchy mum hat

after some sewing for lukas the next posts are going to be about knitting again 🙂 i always have something on the needles. oh, let’s be honest, i always have several things on the needles 😉 but it’s just not as fast as sewing… knitting projects may easily take days, weeks or even months…

this was a very easy and quick project. finished in two days over christmas.

my mum desperately wanted a hat to go with her grey/olive jacket. so i took her to the local yarn store and she picket her favourite yarn herself. and i browsed ravelry for the perfect pattern and did the knitting.

pattern: slouchy copy cat hat by terra jamieson

yarn: lang yarns mille colori in berry and grey shades

needles: 4.5 mm and 5.0 mm